This is a descrition of how you can use the program Handbrake to convert video files to a lower bitrate so they are better suited for use in the repository.
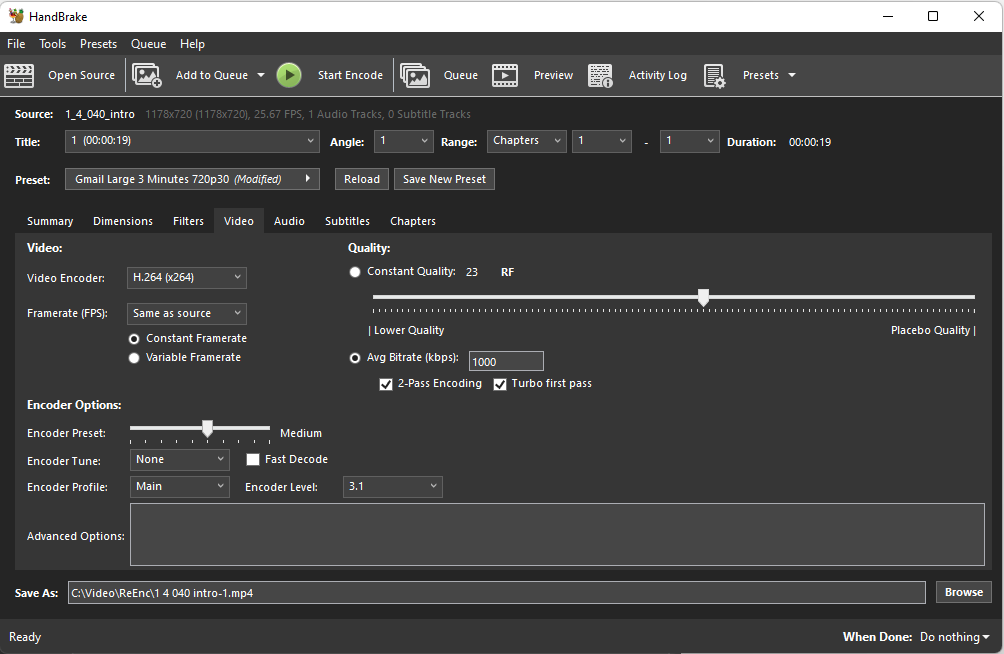
Using this method, video resolution will be reduced to 1280x720 if it is larger and the bitrate will be reduced to about 1Mbit/second. This is useful so the files can be played on all devices and not take up too much of the available bandwidth
The program is free and can be found here: https://handbrake.fr/
Explanations of all settings are shown in the program if you hover your mouse over them.
When you open the program it will ask you to open a file to convert. Use the File button to browse for it or drag and drop the file to the designated area

Initial settings
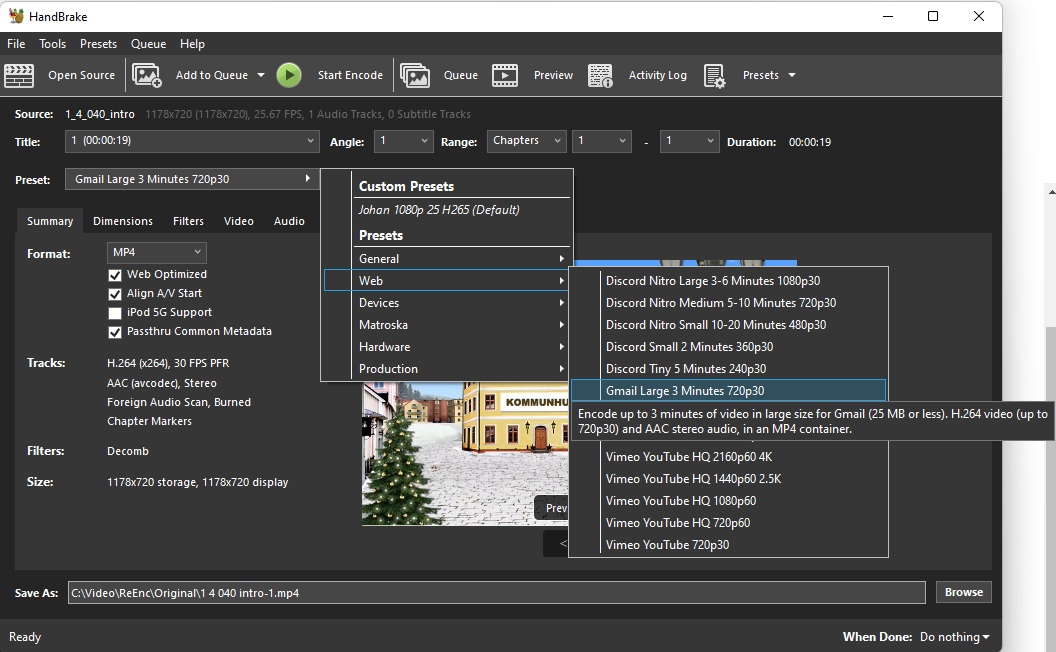
Also check that "MP4 File Extension" is set to "Always use MP4". Click Back when you're done.

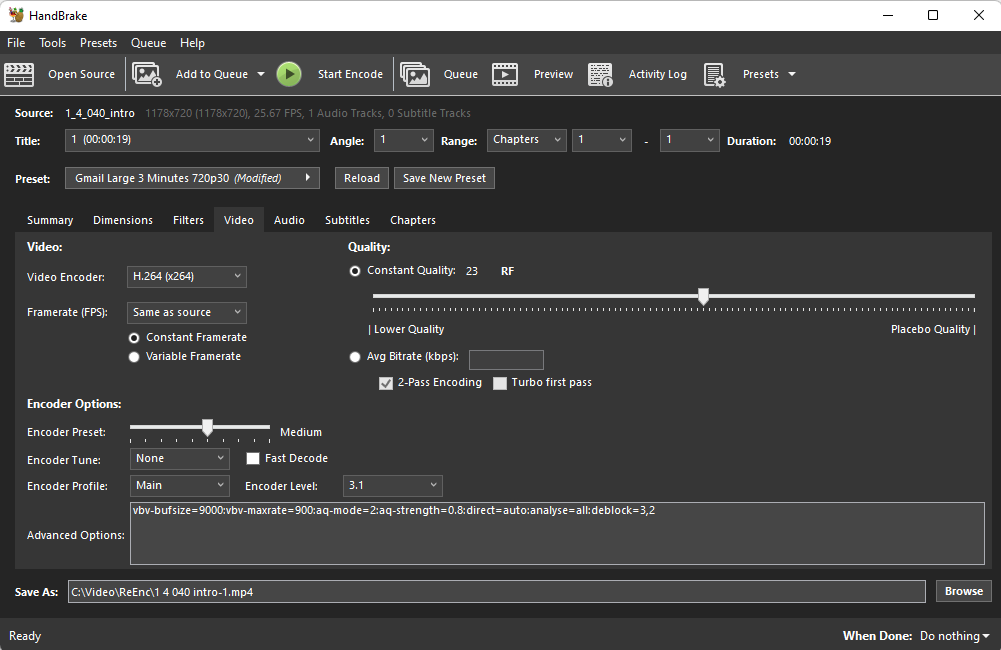
Encode settings
- Framerate should be set to "Same as source" if you don't have a reason to change it
- Check that "Constant Framerate" is checked. This gives better compatibility of the ouput file.
If you want to reencde the audio, leave it as it is.
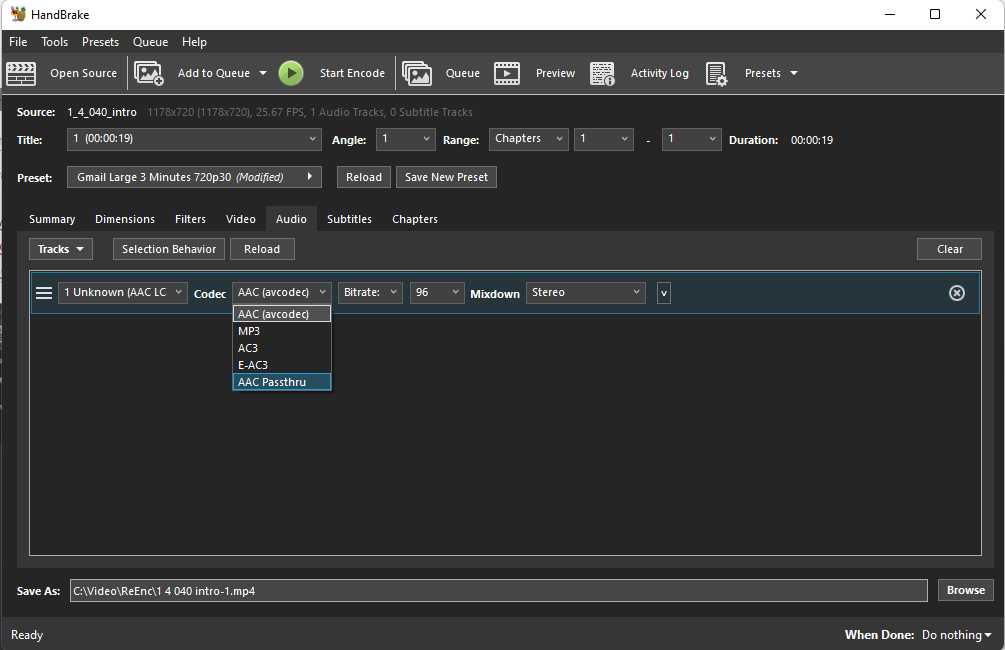
Save Preset
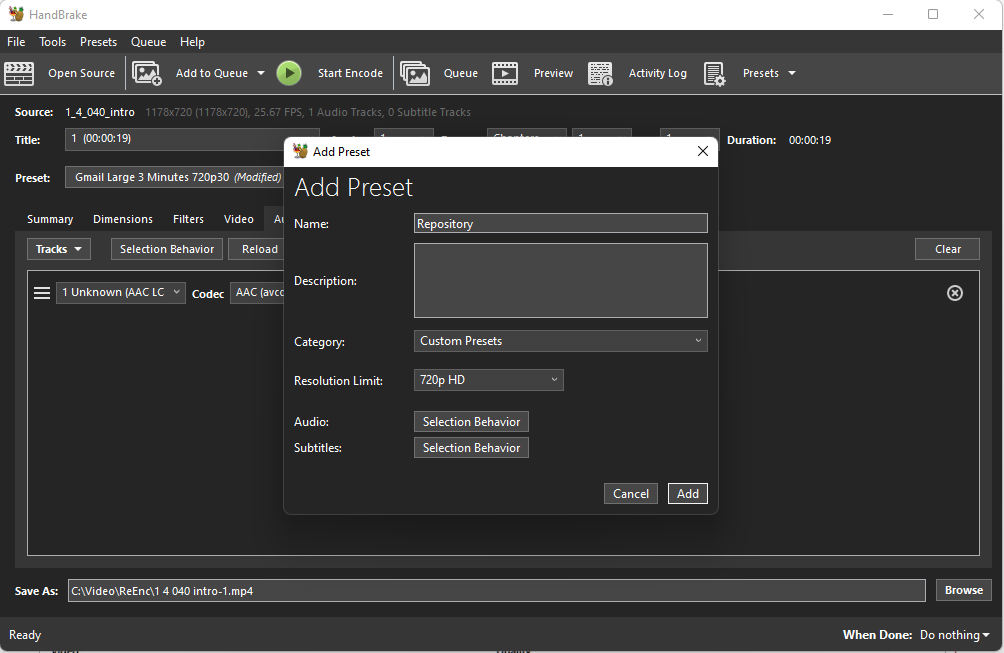
Click "Save New Preset" and give it a describing name. In my case i just used "Repository. Click "Add" and the Preset is saved.
Reencode Video
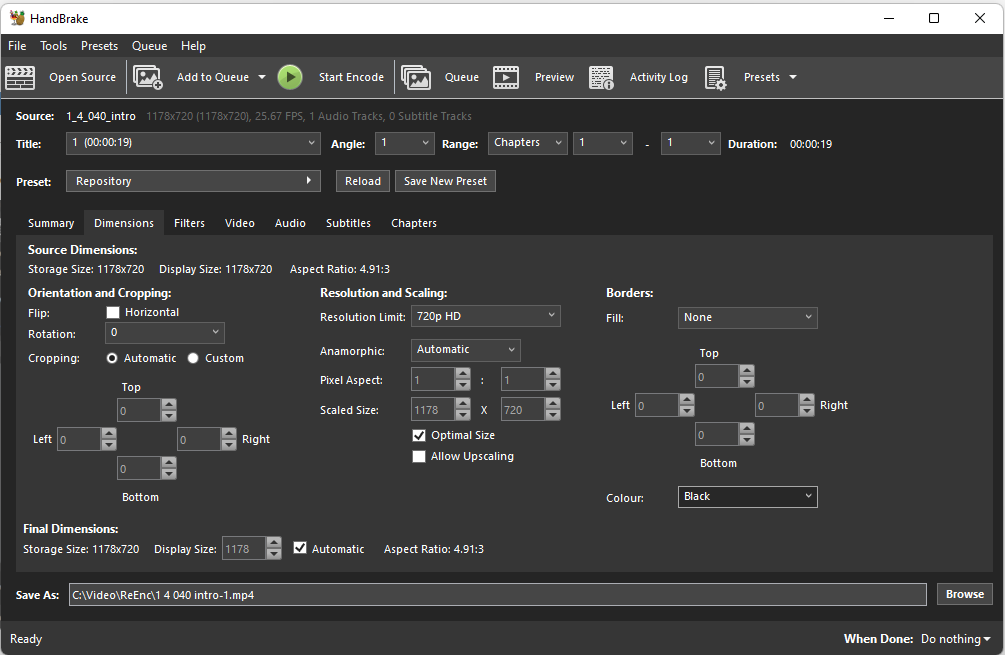
Open a video to reencode using "Source selection" and load the preset you created if it is not already loaded. Go through the tabs and check that all settings looks correct.
In the field "Save As" it's possible to change path and filename for the reencoded video.
Click "Start Encode" to start encoding directly or "Add to Queue" if you want to add more files and reencode them all in one batch.
0 Kommentarer