Once you have opened Planner and created a new plan, or opened an existing plan, you will see the editing page which has the following parts.
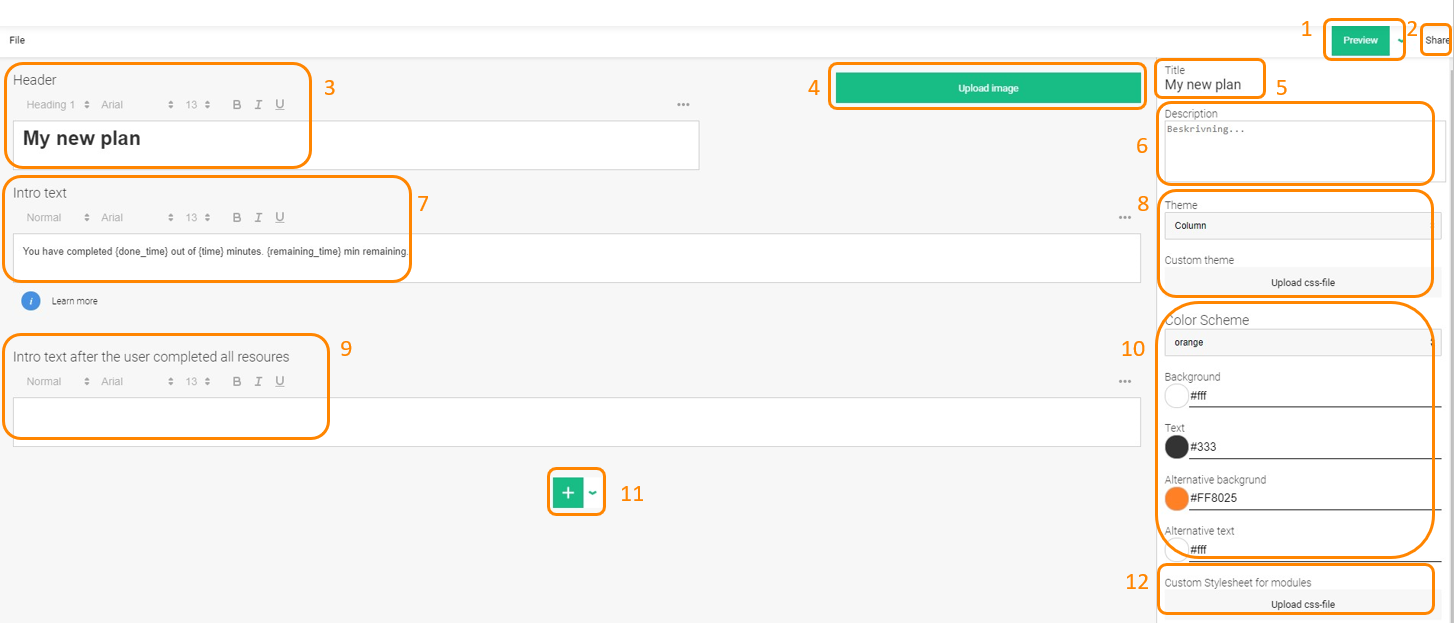
- Preview. Shows how your plan will look for users.
- Share. Similar functionality as the Share function in Author. Note that for Plans, "Share with co-author" and "Publish" only is available from the Library.
- Header. This is where you enter title and text that should always be displayed.
- Upload image. Used to upload a logo or other suitable image.
- Title. This is the name of the plan.
- Description. The text added here will be displayed in the Library.
- Intro text. The text added here will be displayed until the user has completed all material included in the plan. If Estimated time is set for the modules, the following placeholders can be used to display time usage. {done_time} = How many minutes of training is completed, {time} = Total time of the included material, {remaining_time} = How many minutes of training is remaining.
- Theme. There are two themes available that govern how the planning is presented. In the Column theme, introductory text is displayed on the left and the material in a vertical list on the right. In the Rows theme. introductory text is shown at the top and the material in a horizontal list below. If multiple sections are used, each section is displayed as a separate row. If you only have one section, the Column the is probably best. If you have multiple sections, the Rows theme is probably best. For advanced users, it is also possible to upload your own css so the plan can be displayed according to your preference.
- Intro text after the user has completed all resources. The text entered here will be displayed when the user has completed the training.
- Color Scheme. The same functionality as the Color Scheme function in Author.
- This button used to add material or create a new section in the plan.
- For advanced users, there is the possibility to upload your own css to define how the material in the plan should be displayed.
0 Kommentarer