Welcome to Author, Learnify's authoring tool for creating high-quality educational courses online. This article will talk about the different areas within Author and briefly explain how they're used.
Image 1:
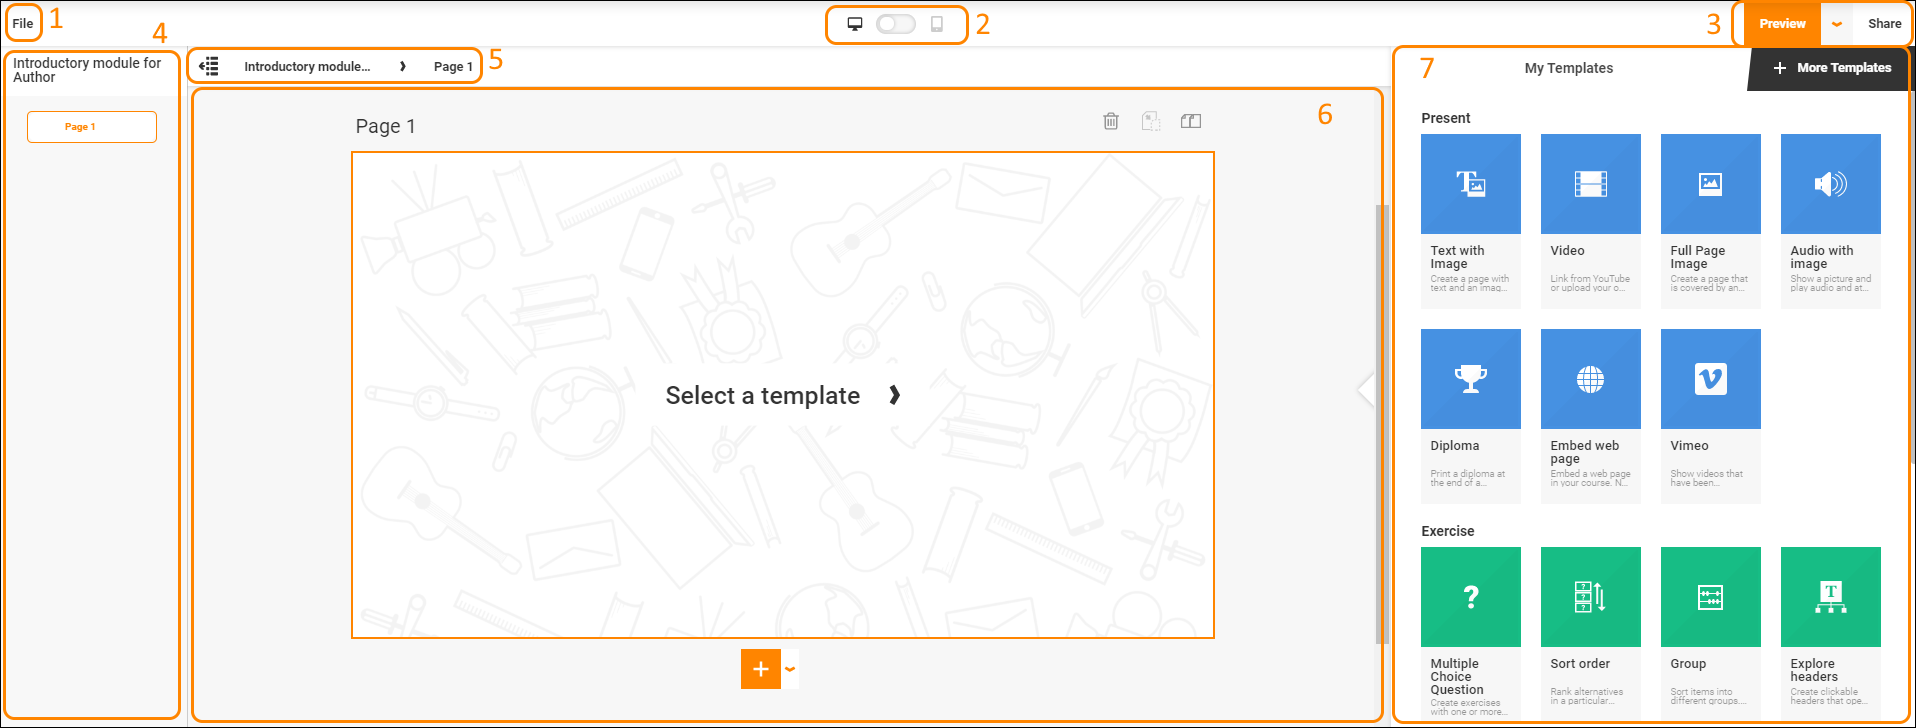
- The menu "File" contains options for creating a new module or opening a recently modified module.
- Page view device selector: Switch between desktop-view and mobile-view for previews in the page view area (6).
- Preview and Share
- Preview: Open the module in the Player to see how it will look for your participants. Use the arrow to choose whether to preview the module in desktop-view or mobile-view.
- Share
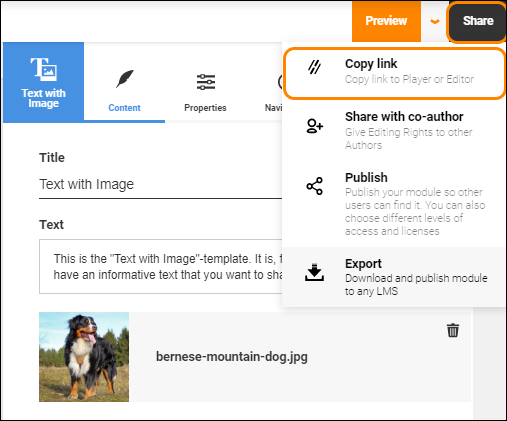
- Copy a link to the module for viewing in either Author or the Player.
- Share with co-author. Add other users that can help update and edit the module.
- Publish your module to your organization or in the open library.
- Export your module to use it in an LMS of your choice. (This alternative is only available for certain users).
- Table of Contents (ToC): Here you can see all pages and chapters in your module. You can also change the order by dragging and dropping a page or chapter on a new spot within the ToC.
- Show/Hide ToC and Navigation Path
- Show/Hide ToC: Click on the far-left icon to show or hide the Table of Contents, customizing the workspace to fit your workflow.
- Navigation Path: Show where in the structure the currently selected page is located.
- Page view area: Contains previews for all your pages as well as functionality to manage your pages.
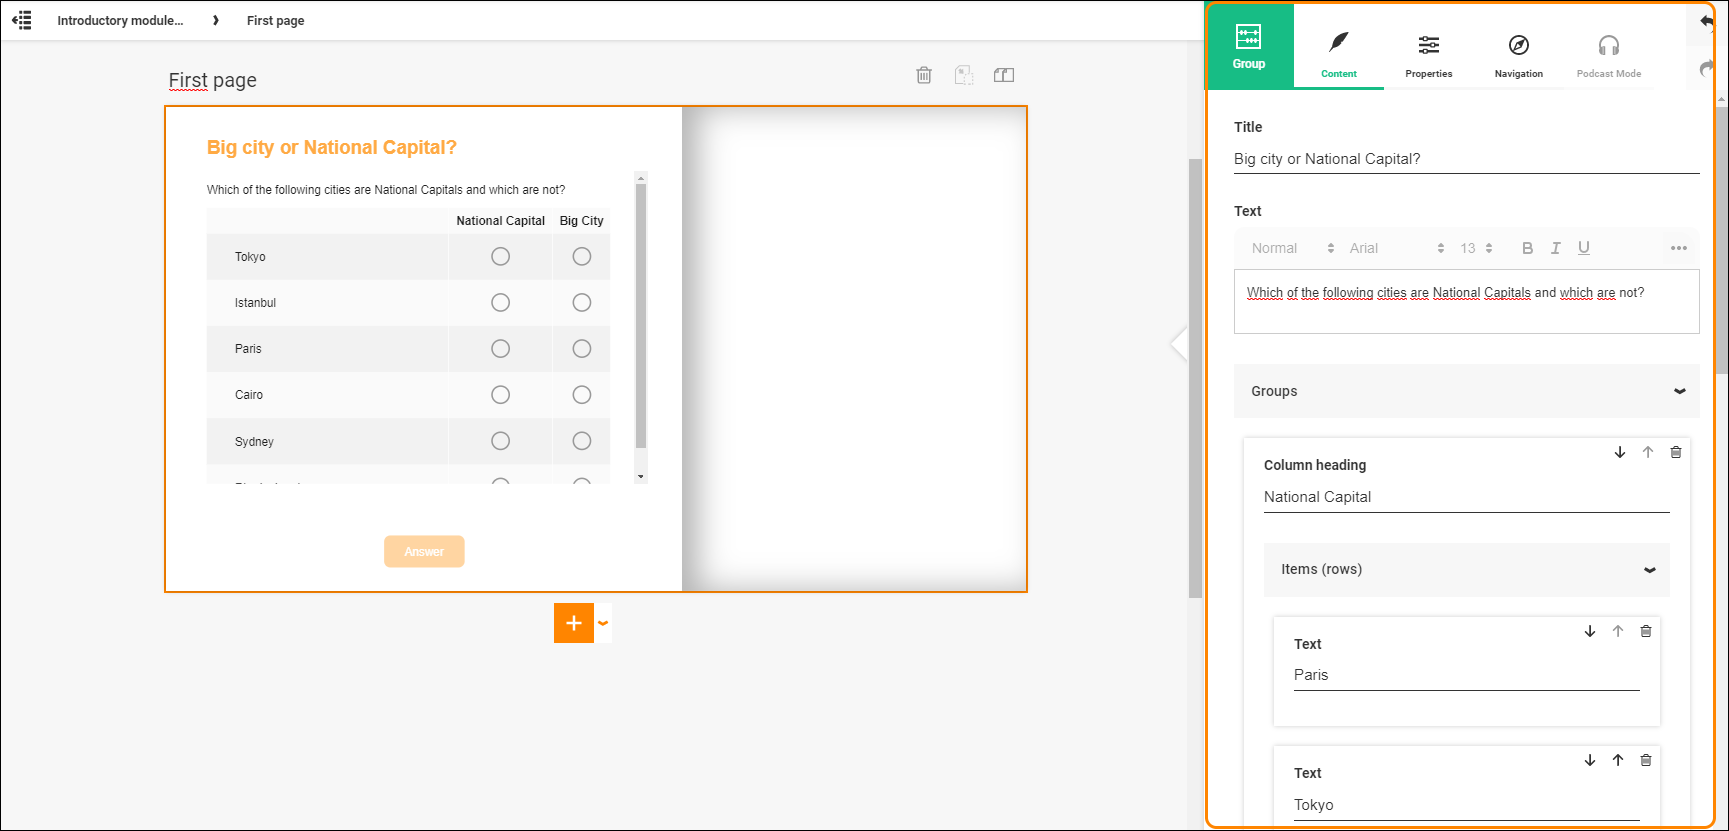
- Edit area: Before choosing a template for your page, this area will contain all templates currently available to you. After choosing a template this area will change to allow you to edit and format your content (Image 2). Note that there are more available templates below the black tab "More templates".
Image 2:
0 Kommentarer